
t4 pro install manual
Welcome to the T4 Pro Install Manual, your comprehensive guide for installing, configuring, and troubleshooting the Honeywell T4 Pro Thermostat. This manual ensures a smooth setup process.
1.1 Overview of the T4 Pro Thermostat
The Honeywell T4 Pro Thermostat is a programmable, smart-enabled device designed for efficient heating and cooling control. It features intuitive scheduling, geofencing capabilities, and remote access via smartphones. With a user-friendly interface, it simplifies temperature management while optimizing energy savings. The thermostat supports various HVAC systems and requires proper wiring, including a common wire (C-wire) for optimal functionality. Its compact design and advanced features make it a versatile choice for modern homes, ensuring comfort and efficiency. Proper installation and setup are crucial for maximizing its performance and smart integration capabilities.
1.2 Importance of Proper Installation
Proper installation of the T4 Pro Thermostat is crucial for ensuring reliable operation, energy efficiency, and safety. Incorrect wiring or setup can lead to system malfunctions, increased energy bills, and potential damage to the HVAC system. A correct installation ensures accurate temperature control, optimal performance, and access to advanced smart features. It also prevents safety hazards, such as electrical issues or improper heating/cooling cycles. Following the manual’s guidelines and manufacturer recommendations is essential for a seamless and efficient setup, guaranteeing long-term functionality and user satisfaction.
1.3 Safety Precautions and Warnings
Before starting the installation, ensure the HVAC system’s power is disconnected to avoid electrical shocks or injuries. Always follow the manufacturer’s guidelines and safety protocols. Improper handling of wires or components can lead to system damage or safety hazards. Use appropriate tools and materials to prevent accidents. If unsure about any step, consult a professional or the manual. Additionally, ensure all connections are secure to prevent short circuits or malfunctioning. Safety should always be the top priority during the installation process to protect both the system and the installer.
System Requirements and Compatibility
The T4 Pro is compatible with most HVAC systems, including forced air, heat pumps, and radiant systems. Ensure your system supports the required voltage and wiring configuration. Proper software and hardware compatibility is essential for optimal performance. Verify system specifications before installation to ensure seamless integration and functionality.
2.1 Checking System Compatibility
Before installation, ensure the T4 Pro thermostat is compatible with your HVAC system. Verify if your system supports the required voltage and wiring configuration. Check if your system type, such as forced air, heat pump, or radiant, is supported. Incompatible systems may lead to malfunctions or damage. Refer to the product manual or manufacturer’s website for a list of compatible systems. If unsure, consult a professional to confirm compatibility and avoid installation issues. Proper system compatibility ensures optimal performance and functionality of the T4 Pro thermostat.
2.2 Understanding Wiring Requirements
Understanding the wiring requirements for the T4 Pro thermostat is crucial for a successful installation. Most systems use 2- to 5-wire configurations, depending on the HVAC setup. Ensure the C wire (common wire) is available for continuous power, especially for smart features. If your system lacks a C wire, verify compatibility with the T4 Pro’s wiring needs. Always check the existing wiring to match the thermostat’s requirements. If unsure, consult a licensed electrician to avoid installation errors. Proper wiring ensures optimal functionality and efficiency of the thermostat.
2.3 Necessary Tools and Materials
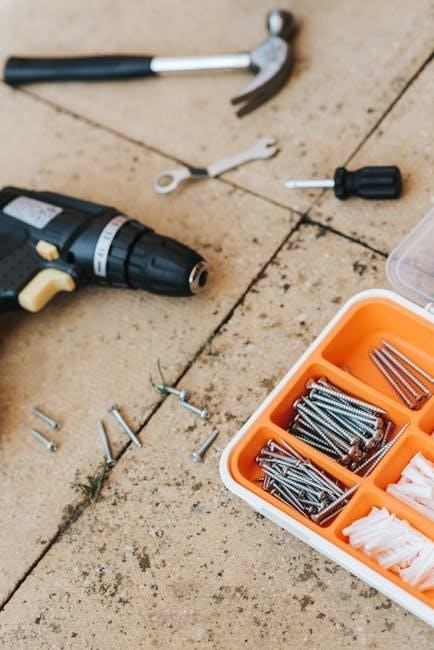
To install the T4 Pro thermostat, gather the necessary tools and materials. A Phillips screwdriver is required for removing the old thermostat and mounting the new one. Wire strippers may be needed if wiring adjustments are required. A voltage tester ensures safe handling of electrical systems. The thermostat comes with mounting hardware, but additional screws or wall anchors might be needed for specific surfaces. A ladder or step stool may be necessary for high installations. Ensure all tools are within reach to streamline the process and avoid delays.

Pre-Installation Preparation
Before installing the T4 Pro, ensure the area is clear, power is off, and all necessary tools are ready. Plan the setup carefully.
3.1 Unpacking the T4 Pro Thermostat
Begin by carefully unpacking the T4 Pro thermostat from its box. Ensure all components, including the thermostat unit, wall plate, screws, and wiring labels, are included. Inspect for any visible damage. Handle the device gently to avoid damage to the screen or internal components. Place all items on a clean, flat surface for easy access during installation. Verify that the packaging contains the complete set of accessories as listed in the manual. If any items are missing or damaged, contact customer support immediately before proceeding.
3.2 Identifying Components and Accessories
Once unpacked, identify all components and accessories provided with the T4 Pro thermostat. These include the main thermostat unit, wall plate, mounting screws, and wiring labels. Additionally, ensure you have the battery (if required), mounting hardware, and any extra accessories like a quick start guide or mounting bracket. Each component plays a critical role in the installation process, so verify their condition and ensure they are compatible with your system. Familiarize yourself with each part to streamline the installation workflow and avoid delays.
3.3 Understanding the Wiring Diagram
The wiring diagram is a critical reference for installing the T4 Pro thermostat. It illustrates the connections between the thermostat and your HVAC system, ensuring proper wiring configuration. Review the diagram to identify terminals (e.g., R, W, Y, G, C, etc.) and their functions. Match the wires from your system to the corresponding terminals on the T4 Pro. Color-coding and labels on the wires can help simplify this process. Double-check the diagram to avoid mismatches, which could lead to system malfunctions. Refer to the manufacturer’s guide for specific wiring requirements and compatibility with your HVAC system.
Installation Steps
The T4 Pro installation involves disconnecting power, removing the old thermostat, wiring the new device, mounting it, and connecting batteries. Follow the sequence carefully for success.
4.1 Disconnecting Power to the HVAC System
Before starting the installation, locate the circuit breaker or switch controlling your HVAC system and turn it off. Verify the system is completely powered down. Use a voltage tester to ensure no electricity is present at the thermostat wiring. This step is critical for safety and prevents electrical shocks or damage during installation. Never rely on the thermostat’s switch alone to disconnect power—always use the main electrical source. If unsure, consult a licensed electrician or refer to your HVAC system’s manual for guidance.
4.2 Removing the Old Thermostat
Start by disconnecting the power to the HVAC system as described in the previous step. Gently pull the old thermostat away from the wall to access the wiring. Do not pull the wires themselves, as this could cause damage. Carefully disconnect each wire from the old thermostat’s terminals, taking note of their positions for later reference. If the thermostat is held in place by screws or clips, remove them to take it down completely. Set the old thermostat aside and ensure the area is clear for the new installation. Be cautious with the wires to avoid bending or damaging them.
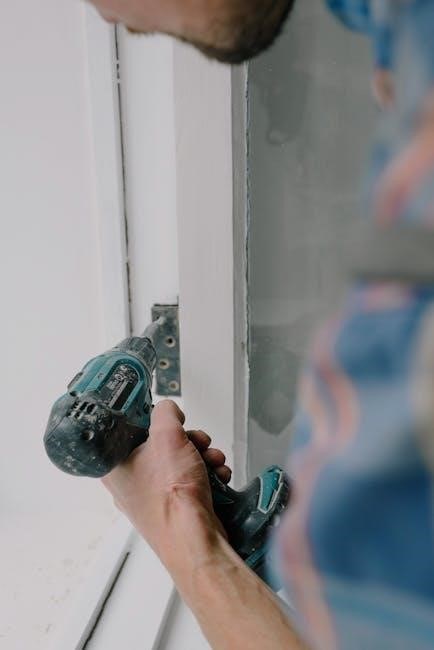
4.3 Wiring the T4 Pro Thermostat
Match the wires from your HVAC system to the corresponding terminals on the T4 Pro Thermostat. Refer to the wiring diagram provided in the manual to ensure correct connections. Gently insert each wire into its designated terminal, securing it firmly. Double-check that no wires are loose or misplaced. If your system requires a common wire (C-wire), ensure it is properly connected to maintain continuous power. Once all wires are securely connected, proceed to the next step in the installation process. Proper wiring is critical for the thermostat to function accurately and control your HVAC system effectively.
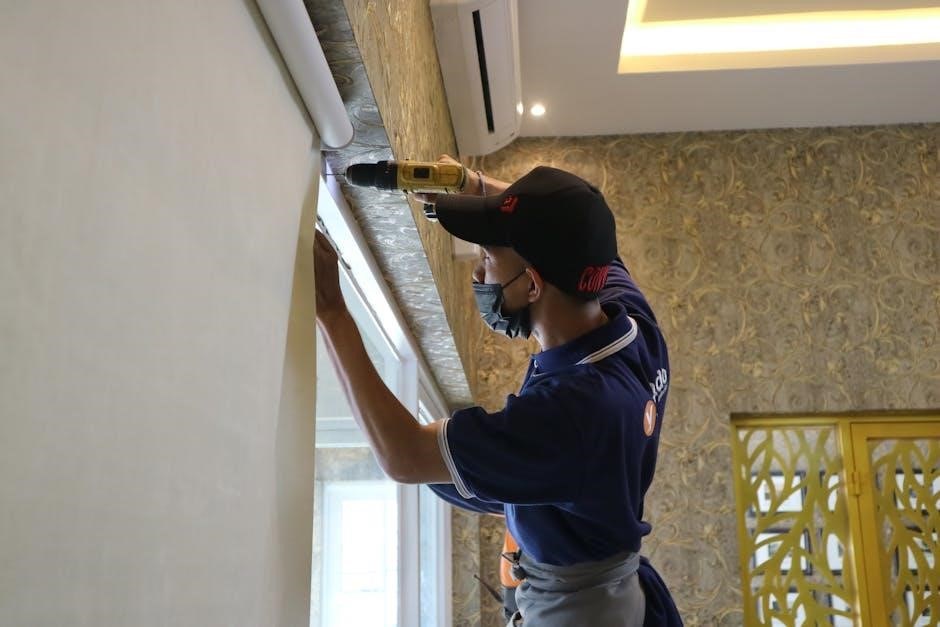
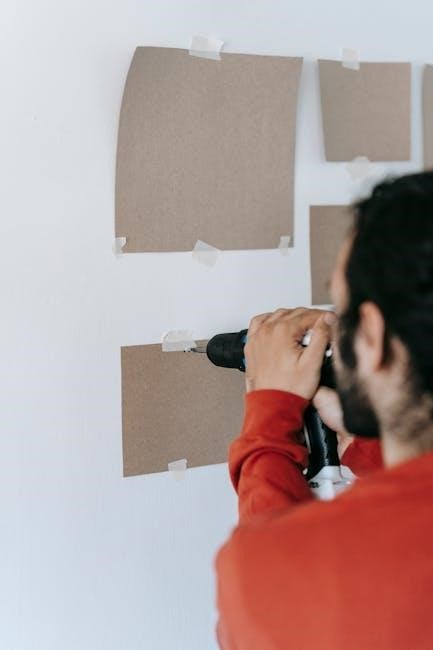
4.4 Mounting the Thermostat on the Wall
Locate the wall mount and peel the backing from the adhesive strip. Press the mount firmly onto the wall, ensuring it is level and aligned correctly. If using screws, drill pilot holes and secure the mount. Align the T4 Pro Thermostat with the wall mount and gently snap it into place. Ensure the thermostat is straight and evenly positioned. Once mounted, press and hold the touchscreen for 5 seconds to save the settings. Verify the thermostat is securely attached and functioning properly before proceeding to the next step.
4.5 Connecting the Batteries
Locate the battery compartment on the back of the T4 Pro Thermostat. Open it by sliding the cover downward or pressing the release tab, depending on the model. Insert the provided batteries, ensuring the + and ー terminals align correctly. Close the compartment securely. The thermostat will automatically power on. If the display does not light up, check the battery orientation and connections. Dispose of old batteries responsibly. Once connected, proceed to the initial setup and configuration steps. Ensure the batteries are fresh for optimal performance.

Initial Setup and Configuration
After installation, power on the thermostat and follow on-screen prompts to set up basic functions, including language, unit preferences, and system type. Ensure all settings are configured correctly for optimal performance.
5.1 Powering On the Thermostat
After installing the T4 Pro thermostat, ensure it is powered on. If using batteries, insert the provided batteries correctly into the thermostat, matching the polarity as indicated. For hardwired systems, verify that the power is switched on at the circuit breaker. Press the power button or touch the designated area to activate the device. The thermostat will display initial setup options, such as language selection and Wi-Fi connectivity. If it doesn’t power on, check the connections or battery freshness. Some models may require an initial software update post-powering on.
5.2 Setting Up the Initial Menu
Once powered on, the T4 Pro thermostat will display the initial menu. Use the touchscreen or buttons to navigate through the setup options. Begin by selecting your preferred language and unit of measurement. Next, choose your location or enter your Wi-Fi network details for smart connectivity. You will also be prompted to set your system type, such as heat-only, cool-only, or heat-pump. Finally, configure basic settings like temperature range and scheduling preferences. Ensure all selections are confirmed to proceed to the next setup phase. Proper initial menu setup is crucial for optimal thermostat performance and functionality.
5.3 Configuring Heating and Cooling Settings
After initial setup, configure your heating and cooling preferences. Set your desired temperature range for both heating and cooling modes, typically between 40°F to 90°F. Select the appropriate system type, such as heat-only, cool-only, or heat-pump. Choose your fan operation settings, including auto or continuous modes. Define temperature swing ranges to maintain consistent comfort levels. Schedule temperature adjustments based on daily routines for energy efficiency. Ensure all settings align with your HVAC system capabilities for optimal performance and energy savings. Proper configuration ensures reliable and efficient heating and cooling operation throughout the year.
5.4 Setting the Time and Date
Accurately set the time and date on your T4 Pro Thermostat to ensure proper scheduling and operation. Navigate to the system menu and select the “Time and Date” option. Use the touch interface to adjust the hour, minute, and AM/PM settings. Set the correct date, including the month, day, and year. Ensure the time format is set to either 12-hour or 24-hour mode, depending on your preference. Confirm your settings to save them. For convenience, enable the “Auto-Update” feature if available, which synchronizes time changes, such as daylight saving adjustments.

Advanced Features and Programming
Explore advanced features like scheduling, geofencing, and smart home integration for enhanced control. Customize settings to optimize energy efficiency and system performance for your comfort preferences.
6.1 Understanding Scheduling Options
The T4 Pro allows you to create customized daily schedules to regulate your home’s temperature automatically. Set specific temperature targets for different times of the day, such as waking up, leaving home, or sleeping. This feature ensures your HVAC system operates efficiently, saving energy when you’re not home. You can program up to six schedules per day, adjusting settings for weekdays and weekends separately. Use the thermostat’s interface or app to customize these settings, ensuring a balance between comfort and energy savings effortlessly.
6.2 Setting Up Geofencing (if applicable)
Geofencing allows the T4 Pro to adjust your home’s temperature based on your location. To set this up, enable location services in the T4 Pro app and define a virtual boundary around your home. When you leave or enter this area, the thermostat can automatically switch to an energy-saving mode or resume normal operation. Customize the radius and temperature settings for seamless comfort and efficiency. Ensure your device’s location accuracy is optimized for reliable operation. This feature enhances smart home automation by integrating location-based temperature control.
6.3 Enabling Smart Features and Remote Access
To enable smart features and remote access on your T4 Pro, first ensure the thermostat is connected to your Wi-Fi network. Open the T4 Pro app and navigate to the settings menu. Select “Smart Features” and toggle on “Remote Access.” This allows you to control the thermostat via your smartphone or voice assistant. Ensure your device is updated to the latest firmware for optimal performance. With remote access enabled, you can adjust settings, monitor energy usage, and receive notifications, enhancing your smart home experience with convenience and efficiency.
6.4 Adjusting Advanced Settings for Optimal Performance
To optimize your T4 Pro’s performance, navigate to the advanced settings menu. Adjust temperature differential, cycle times, and adaptive recovery options to tailor operation to your preferences. Enable features like smart recovery to pre-cool or pre-heat your home efficiently. Fine-tune geofencing boundaries for precise location-based control. Regularly review and update these settings to maintain energy efficiency and system reliability. For best results, ensure all adjustments align with your HVAC system’s capabilities and your local climate conditions. Refer to the user manual or app support for detailed guidance on customizing these settings effectively.

Testing the System
After installation, test the T4 Pro by running heating and cooling cycles to ensure proper functionality, system response, and efficient operation. Confirm all settings are correctly configured for optimal performance.
7.1 Running a Test Cycle for Heating
To test the heating system, set the T4 Pro to “Heat” mode and raise the target temperature above the current room temperature. Ensure the HVAC system activates and the furnace operates correctly. Verify the thermostat display reflects the heating cycle and monitor for any error messages. If the system fails to respond, check wiring connections and ensure the furnace is powered. Allow the cycle to complete to confirm proper functionality and consistent temperature regulation. This step ensures the T4 Pro accurately controls the heating system for reliable performance.
7.2 Running a Test Cycle for Cooling
To test the cooling system, switch the T4 Pro to “Cool” mode and lower the target temperature below the current room temperature. Ensure the HVAC system activates and the air conditioning unit operates properly. Verify the thermostat display indicates the cooling cycle and monitor for any error messages. If the system does not respond, check wiring connections and ensure the AC is powered. Allow the cycle to complete to confirm consistent cooling performance. This ensures the T4 Pro accurately controls the cooling system for efficient operation.
7.3 Verifying Proper System Operation
After completing the test cycles, ensure the T4 Pro thermostat operates seamlessly with your HVAC system. Check if the thermostat responds correctly to temperature changes and if the display accurately reflects the system’s status. Verify that heating and cooling cycles start and stop as commanded. Inspect visually for proper airflow and ensure no unusual noises or malfunctions occur. If issues arise, review wiring connections or settings for accuracy. This step confirms the system is fully functional and integrated with the T4 Pro for reliable performance.
Troubleshooting Common Issues
This section helps identify and fix common T4 Pro thermostat issues, ensuring efficient function and comfort with easy troubleshooting steps and solutions.
8.1 No Power to the Thermostat
Ensure the HVAC system’s power is off at the breaker. Check wiring connections, especially the Rc wire, for looseness or damage. Verify the circuit breaker hasn’t tripped and no fuses are blown. If using battery power, replace batteries with fresh ones. Consult the wiring diagram in section 3.3 for connection accuracy. If issues persist, contact customer support or consider professional assistance as outlined in section 11.3 for further troubleshooting or potential device replacement.
8.2 Incorrect Temperature Readings
If the thermostat displays incorrect temperatures, first check its placement. Ensure it is not exposed to direct sunlight, drafts, or extreme temperatures. Verify that the sensor is clean and free from obstructions. Recalibrate the temperature sensor through the thermostat’s menu, following the steps outlined in section 5.2. If issues persist, inspect the wiring connections in section 4.3 for accuracy. A faulty temperature sensor may require replacement. Consult section 11.1 for manufacturer support or section 11.3 for professional assistance if the problem remains unresolved.
8.3 System Not Responding to Commands
If the system fails to respond to thermostat commands, verify that the thermostat has power. Check circuit breakers or fuses and ensure wiring connections are secure (refer to section 4.3). Low battery levels may cause unresponsiveness; replace batteries as outlined in section 4.5. Restart the thermostat by removing and reinstalling the batteries. If issues persist, reset the thermostat to factory settings via the menu (section 5.2). If the problem continues, consult section 11.1 for support or section 11.3 for professional assistance to resolve the issue effectively.
8.4 Common Wiring Issues and Solutions
Common wiring issues include loose connections, incorrect wire assignments, or damaged wires. Verify all connections match the wiring diagram (section 3.3). Ensure no wires are pinched or frayed. If issues persist, use a multimeter to test for continuity and voltage. Consult section 2.2 for wiring requirements. If unsure, refer to section 11.1 for support or section 11.3 for professional assistance to resolve wiring-related problems effectively and safely, ensuring proper system functionality and reliability after installation.
Maintenance and Upkeep
Regular maintenance ensures optimal performance and longevity of your T4 Pro Thermostat. Clean the device, replace batteries, and update software periodically to prevent issues and enhance functionality.
9.1 Cleaning the Thermostat
Cleaning the T4 Pro Thermostat is essential for maintaining accuracy and efficiency. Turn off power to the system before cleaning. Use a soft, dry cloth to gently wipe the display and exterior surfaces. Avoid harsh chemicals, abrasive materials, or liquids, as they may damage the device. Regularly cleaning ensures proper sensor functionality and prevents dust buildup, which can affect performance. For stubborn stains, slightly dampen the cloth with water, but ensure no moisture enters the thermostat. Cleaning should be done every 2-3 months or as needed to maintain optimal operation.
9.2 Replacing Batteries
Replacing the batteries in your T4 Pro Thermostat is a straightforward process. Ensure the system is powered off before starting. Open the thermostat’s battery compartment, usually located on the back or bottom. Remove the old batteries and dispose of them properly. Insert the new batteries, ensuring they are the correct type (typically AA or AAA) and aligned with the polarity markings. Close the compartment securely. If the thermostat has a backup battery, repeat the process for it as well. Replace batteries annually or when the low-battery indicator appears to maintain uninterrupted operation.
9.3 Updating Software and Firmware
To ensure optimal performance, regularly update your T4 Pro Thermostat’s software and firmware. Check for updates via the thermostat’s menu or through the dedicated app. Download the latest version and follow on-screen instructions to install. Do not interrupt the update process. Once complete, restart the thermostat to apply changes. Updated software enhances features, improves compatibility, and fixes bugs. Always verify the update was successful by checking the version number in the settings menu. Regular updates are crucial for maintaining functionality and security.
Congratulations! Your T4 Pro installation is complete. Perform final checks to ensure all settings are correct and the system operates efficiently. For any issues, refer to the troubleshooting section or contact customer support.
10.1 Verifying All Settings Are Correct
Once the installation is complete, review all configured settings to ensure accuracy. Check temperature setpoints, scheduling, and smart integrations. Verify that the thermostat is connected to your network and that remote access is enabled. Confirm that geofencing and smart features are properly set up. Ensure the time and date are correct for accurate scheduling. Review heating and cooling parameters to match your preferences. Double-check wiring connections and battery installations. If everything is correctly configured, the system should operate seamlessly. If any discrepancies are found, refer to the troubleshooting section for guidance.
10.2 Ensuring System Efficiency and Performance
To maximize energy efficiency, verify that temperature setpoints align with your comfort preferences and energy-saving goals. Ensure schedules are programmed correctly to avoid unnecessary heating or cooling. Check that the thermostat is properly calibrated and leveled for accurate temperature readings. Review smart features like geofencing and smart learning to optimize performance. Confirm that all wiring connections are secure and functioning correctly. Regularly updating software ensures the system operates at peak efficiency. Refer to the troubleshooting section if issues arise to maintain optimal performance and energy savings. Proper setup guarantees reliable operation and energy efficiency.
10.3 Final Safety Check
After completing the installation and setup, perform a final safety check to ensure everything operates safely and efficiently. Verify that all electrical connections are secure and meet local safety standards. Check for any loose wires or damaged components that could pose a hazard. Ensure the thermostat is properly mounted and level to avoid malfunction. Test the system’s response to temperature changes and confirm that safety features, like emergency heat shutdown, are functioning. Review the installation steps to ensure no critical safety measures were overlooked. This final check ensures reliable and safe operation of your T4 Pro thermostat system.
Additional Resources
For further assistance, refer to the manufacturer’s official guides, support hotline, and online troubleshooting resources. Professional installation services are also available for complex setups.
11.1 Manufacturer’s Customer Support
The manufacturer offers comprehensive customer support for T4 Pro thermostat installations. Their team provides troubleshooting, installation guidance, and technical assistance. Users can contact support via phone, email, or live chat. The support team is available to address issues like wiring, connectivity, or software updates. Additionally, the manufacturer’s website hosts a dedicated support page with downloadable resources, FAQs, and user manuals. For complex problems, certified specialists can guide you through the process, ensuring your system operates efficiently and safely. Reach out to them for personalized assistance tailored to your installation needs.
11.2 Online Manuals and Guides
The T4 Pro install manual and additional guides are available online for easy access; These resources include detailed installation instructions, troubleshooting tips, and user manuals. Visit the manufacturer’s official website or trusted online platforms to download these materials. The guides provide step-by-step instructions, diagrams, and compatibility information to ensure a smooth setup. Regularly updated, they reflect the latest features and improvements. Utilize these resources to resolve common issues or explore advanced settings. Always refer to official sources for accurate and reliable information to maintain your system’s optimal performance and safety.
11.3 Professional Installation Services
If you prefer expert assistance, professional installation services are available for the T4 Pro thermostat. Certified technicians will ensure a flawless setup, adhering to safety standards and optimal performance. This service is ideal for complex systems or if you lack confidence in DIY installation.
Benefits include expert knowledge, warranty compliance, and reliable results. Contact the manufacturer or authorized partners to schedule a professional installation, ensuring your T4 Pro operates efficiently and safely from day one.